OBS Integer Scale Guide
The purpose of this tutorial is to illustrate how to set up both the source and OBS in a way to prevent scaling the input feed in any way. This will result in a perfectly sharp image in your stream or recording, and is recommended whereever feasible. This guide uses SNES emulator capture as an example, but hopefully has enough explanations in it to allow you to adapt it to your use case.
If you don't know what integer scale is - it refers to only scaling a source image by full numbers (integers), as opposed to floating point numbers which would result in loss of information and therefore blur. You can imagine it as trying to multiply a pixel by 1.5, but the end result has to be displayed on a pixel grid as well - that simply cannot look good.
Take the following image as an example - the first image from the left is the original, the second is at a scale factor of 1.5 without any interpolation, the third is at a scale factor of 1.5 with interpolation, and finally the fourth is at a scale factor of 2 without interpolation. The third image is closest to the processing done to a video stream, which is why your game source will look blurry if you scale it by floating point factors.

Chances are that the way you set up your scene in OBS was to add the game feed in some way, then scaled it to fit the viewport. If so, your stream will suffer from the same effect illustrated above (although slightly less noticeable due to the exposed and static nature of the example image).
The guide's length might be daunting, but that's because it tries to be explanatory in why things work the way they do in order to give you a good understanding of a rather simple concept. Most of it should be a one-time readthrough without anything you actually have to take action on.
Initial Considerations
In order to implement integer scaling, you have to be aware of the resolution of your source, as well as the resolution of your canvas in OBS. Since the resolution of the source is likely static, you can customize the resolution of your canvas to manage screen real estate. Again, here's an example image of why you might want to choose that:
The SNES has a native resolution of 256×224 pixels. By multiplying each side by an integer (scale factor), you get the following possible integer-scaled source resolutions:
| Scale Factor | Resulting Source Resolution |
|---|---|
| 1 | 256×224 |
| 2 | 512×448 |
| 3 | 768×672 |
| 4 | 1024×896 |
From here, you might want to pick a fitting canvas resolution for your stream, perhaps loosely based on your current one. Technically, you could stream at any resolution, however sticking to common resolutions has a few advantages for both you and your viewers. You also probably want to choose a resolution with a 16:9 aspect ratio, as that's the most common display ratio out there, meaning when your video is being viewed in full screen, it will cover the entire screen.
You will notice that simply looking at the second number (the height of the resolution) will suffice, as the SNES has a 8:7 aspect ratio which means you'll end up with space on the horizontal axis, as well as that's generally how display resolutions are abbreviated, i.e. 720p is a shorthand for 1280x720 pixels.
Going with the recommendations from above, here's the next closest canvas resolutions:
| Source Resolution | Canvas Resolution | Leftover Vertical Space | Advantages | Preview |
|---|---|---|---|---|
| 768×672 | 1280×720 (720p) | 48 pixels | good compromise for lower bitrates | example image |
| 1024×896 | 1600x900 (900p) | 4 pixels | least leftover vertical space | example image |
| 1024×896 | 1920×1080 (1080p) | 184 pixels | most common display resolution | example image |
If the choice isn't obvious to you because of some individual preference, consider that higher resolutions will scale to different monitor sizes better than lower ones, so they are generally preferable. In turn, a higher resolution requires a higher bitrate. 1080p comes with a high amount of leftover space, which might be a feature for you if you have a stream layout image that takes up vertical space.
Now you have all the information needed to decide on a resolution for both your source and your canvas.
For the purpose of being able to show all the necessary details, this guide assumes a source resolution of 768×672 (scale factor of 3) and a target canvas resolution of 720p for its examples. However, you should carefully consider which resolutions you want to go with and not simply use these values.
Setting up the source
While the SNES's internal resolution is always 256×224, your emulator will likely render it at a different resolution by default to make it playable on modern displays. Here's an image of how small the SNES's native resolution actually is if drawn without any scaling:

An important thing to understand at this point is that you don't have to choose the same scaling factor for your emulator resolution that you used for your source resolution. You can, for example, set your emulator to a scale factor of 4 while your source resolution uses a scale factor of 3 - because both are integer-scaled, you can freely scale the emulator resolution down to your source resolution in OBS later. This also works without compromising image quality if you upscale the image, which might be interesting if your monitor isn't as large as the intended canvas resolution.
For this example, the target emulator resolution is going to be 1024×896 (scale factor of 4) which is larger than the canvas resolution to illustrate this.
Upscaling is generally a feature, after all you don't want to play on a tiny portion of your screen when you have a much larger display area available. However, you need to make sure that the render resolution isn't scaled to fit the window or the screen, but instead adheres to integer scaling.
This process will be different for every emulator, or even very for any given emulator between versions or operating systems. A general list of things you want to check for in the display options is:
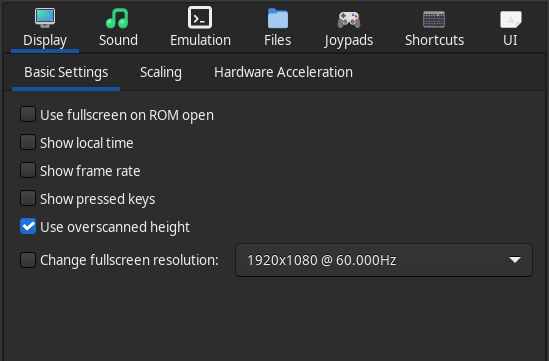
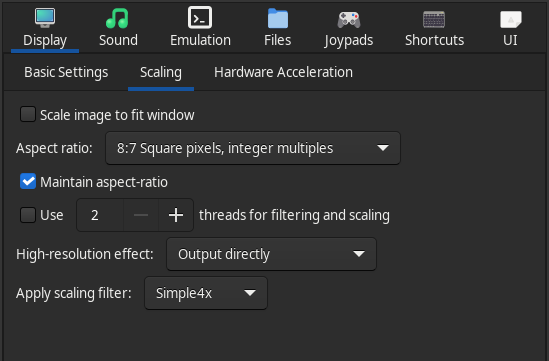
- Set the aspect ratio to 8:7 (the SNES's native aspect ratio)
- Enable overscan/overscanned height
- Disable stretch to window, scale to window, and emulate fullscreen options if available
- Enable integer scaling options if there are any
- Set a rendering scale factor either by a dedicated option or by applying a non-deforming filter (such as Simple4x)
- Play in windowed mode
Here's an example how these settings look in Snes9x 1.62.3 GTK+:
Because the desired scale factor for the emulator resolution is 4, the filter Simple4x is chosen.
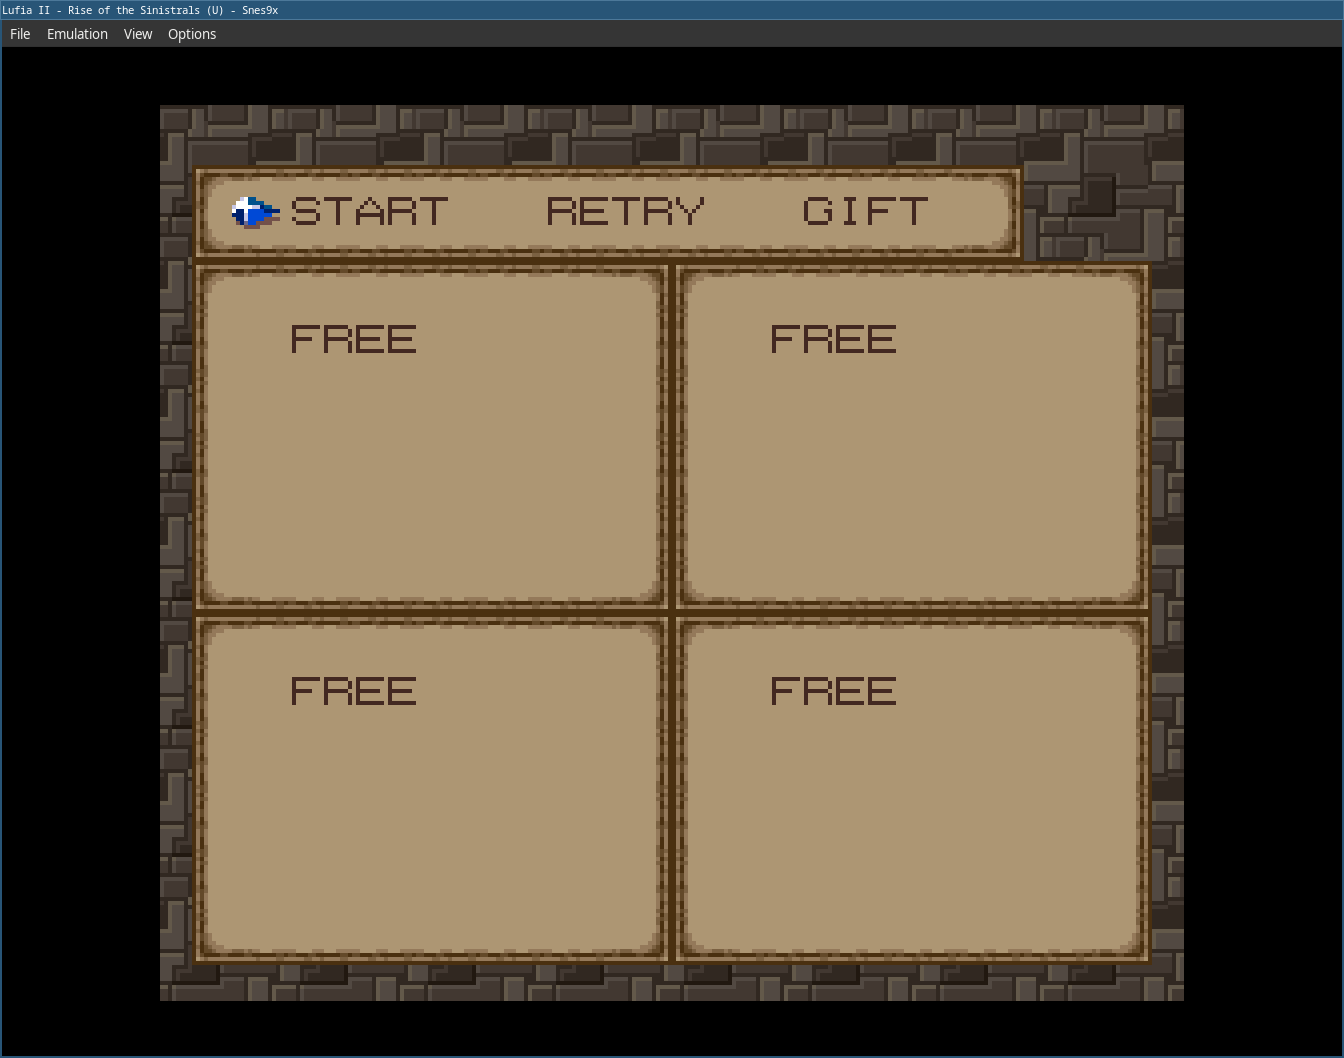
Check your settings by verifying that the emulator resolution you see now is the desired size. You can use a measuring tool software or a graphic program to determine the actual size of the source being drawn, but it should at this point be identical to the target emulator resolution.
For this example, the emulator resolution is 1024×896, so that's the result you should be getting.
If you have issues with the emulator setup, consider asking people in your community who are likely to work with the same emulators and therefore should be able to help.
Setting up the canvas in OBS
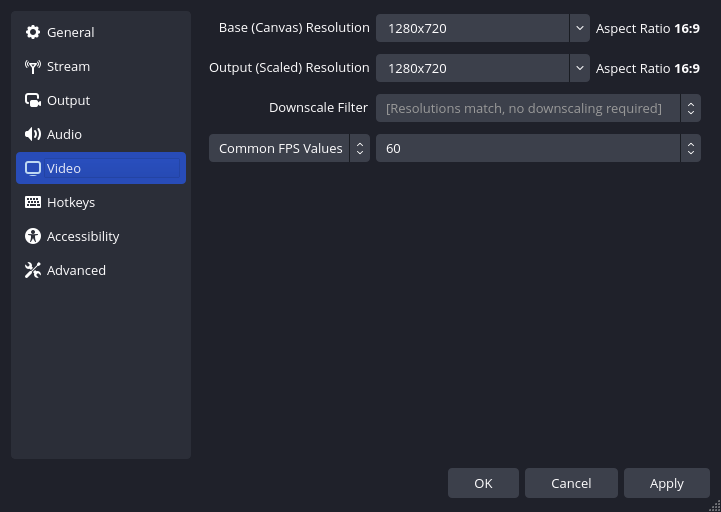
First of all, you need to set your canvas resolution, which you can do in the video settings tab. Set both base and output resolution to the previously chosen canvas resolution.
Next, set up a window capture source and choose the emulator to be captured. Refrain from manually scaling it, and if you modify a previously created source or for other reasons aren't sure whether you scaled it, right click on the source, then click Transform -> Reset Transform, which will restore the original size of the source - this is what you want, even if it will look quirky right now.
Now you need to crop the source, which you should do via the Crop/Pad filter. Make sure your emulator window has the size it'll always have, then set the values for all four directions until you don't have any more surrounding space (really make sure you get this pixel-perfect).
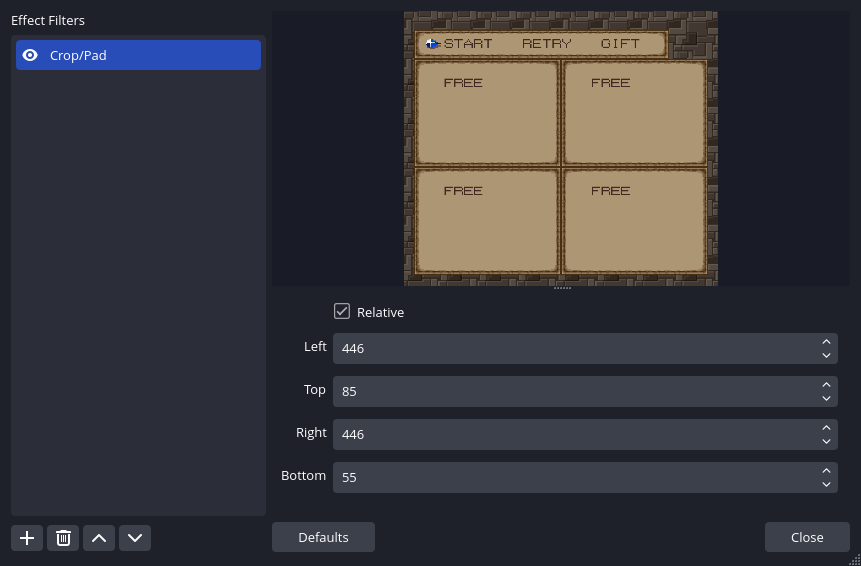
When you're done, exit the filter manager and right-click the source, then click Transform -> Edit Transform and verify that the size of the source is identical to your emulator resolution. If it isn't, you probably missed a few pixels in the crop.
At this point, the size should be identical to the emulator resolution.
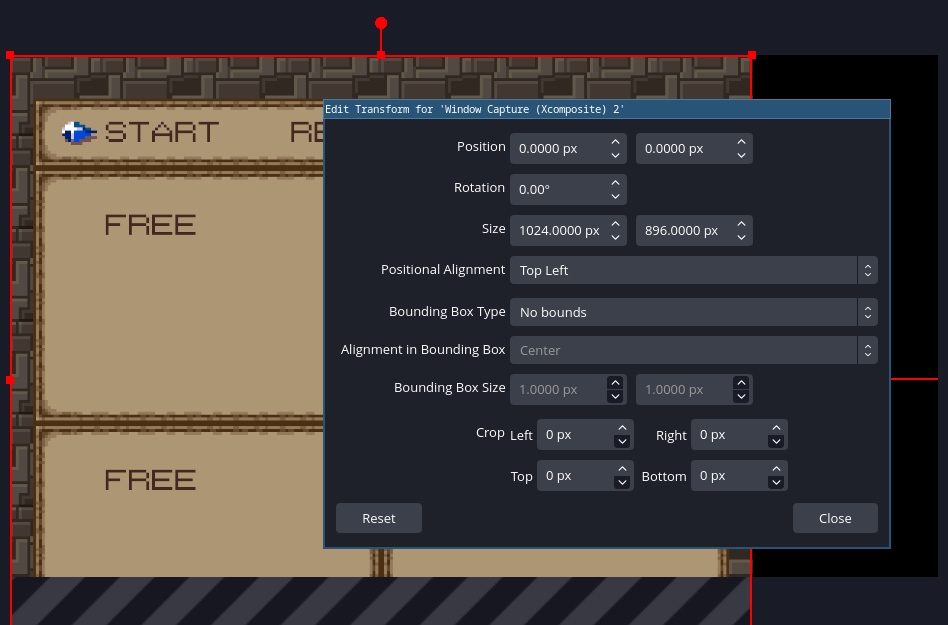
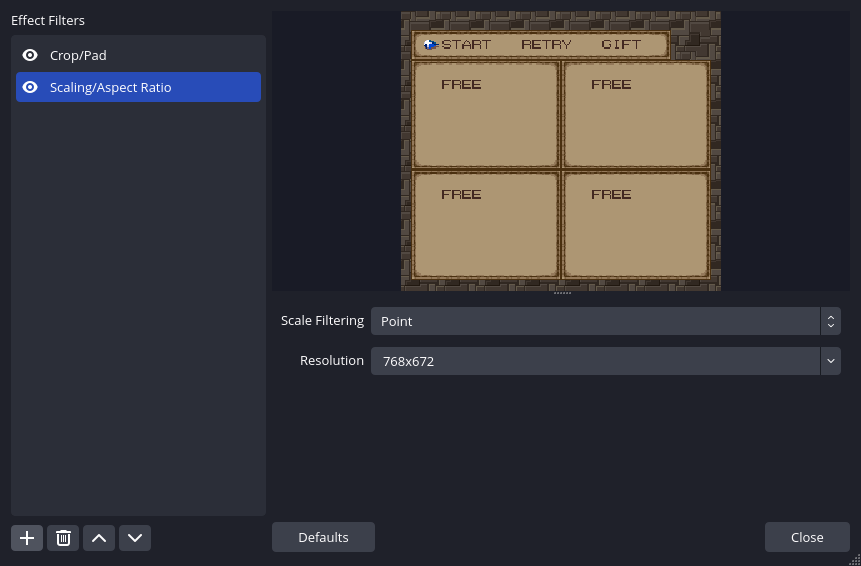
If your emulator resolution and source resolution differ, you now have to scale it to the source resolution. For this to work properly, you need to absolutely be sure the previous step of pixel-perfectly cropping the source succeeded. Add a Scaling/Aspect Ratio filter to your source, below the Crop/Pad filter, and set it up by choosing the Point filter method and the source resolution.
Finally, you're scaling the emulator resolution (scale factor 4) down to the source resolution (scale factor 3)
Conclusion
Now you have a source that you can freely work with within OBS to compose your scene, and due to the effort you've gone through, you made sure that it isn't scaled at any point in the process. It will still be stretched to fit by any video player whenever the drawing resolution doesn't match your canvas resolution, but a single scale doesn't matter as much as multiple ones.
Going forward, make sure you never manually scale the source you created (and optimally, no other source either because of course, any other visual element of your stream will be subject to the same effects of floating point scaling), and use Reset Transform whenever it happens by accident. It's a good idea to lock the source once you positioned it the way you want to in order to prevent accidential scaling.